To set up a Customer Portal in HubSpot CRM, make sure you’re on Service Hub Professional or Enterprise with a shared inbox and knowledge base connected. Then head to Content -> Customer Portal in your settings, spin up a new portal, and tie it to the right shared inbox so every ticket that appears there also appears here.
A single, straightforward place where your customers can log in, see what’s happening with their requests, and help themselves before they ever hit “reply.”
70% of customers expect any agent or employee they engage with to have full context of their situation. (Zendesk, 2023).
Read more below on how to create your own Customer Portal and why it matters.
Setting up a Customer Portal in HubSpot
What is a Customer Portal?
A customer portal is a secure, online platform/private page where customers/users can access personalized information, manage their accounts, and find self-service options to interact with a company.
It acts as a central hub for actions like submitting and tracking support tickets, viewing orders, accessing a knowledge base, and managing subscriptions.
In HubSpot specifically, a Customer Portal is a password-protected area connected to your Service Hub where contacts can log in to view and manage their support tickets. Instead of digging through email threads, your customers see a clear, real-time overview of all open and closed tickets, their status, and any updates from your team — all powered by HubSpot’s CRM data.
Why is a Customer Portal important?
A customer portal is important because it makes your CRM a 24/7 service entry point: customers can log in, see the status of their requests, find answers, and solve simple issues on their own. For your team, it means fewer emails, clearer expectations, better data in HubSpot, and one shared view of the customer journey across marketing, sales, and service.
Over half of consumers say that great customer service is more important to them than price when deciding which brands to patronize. (Shep Hyken, 2023).
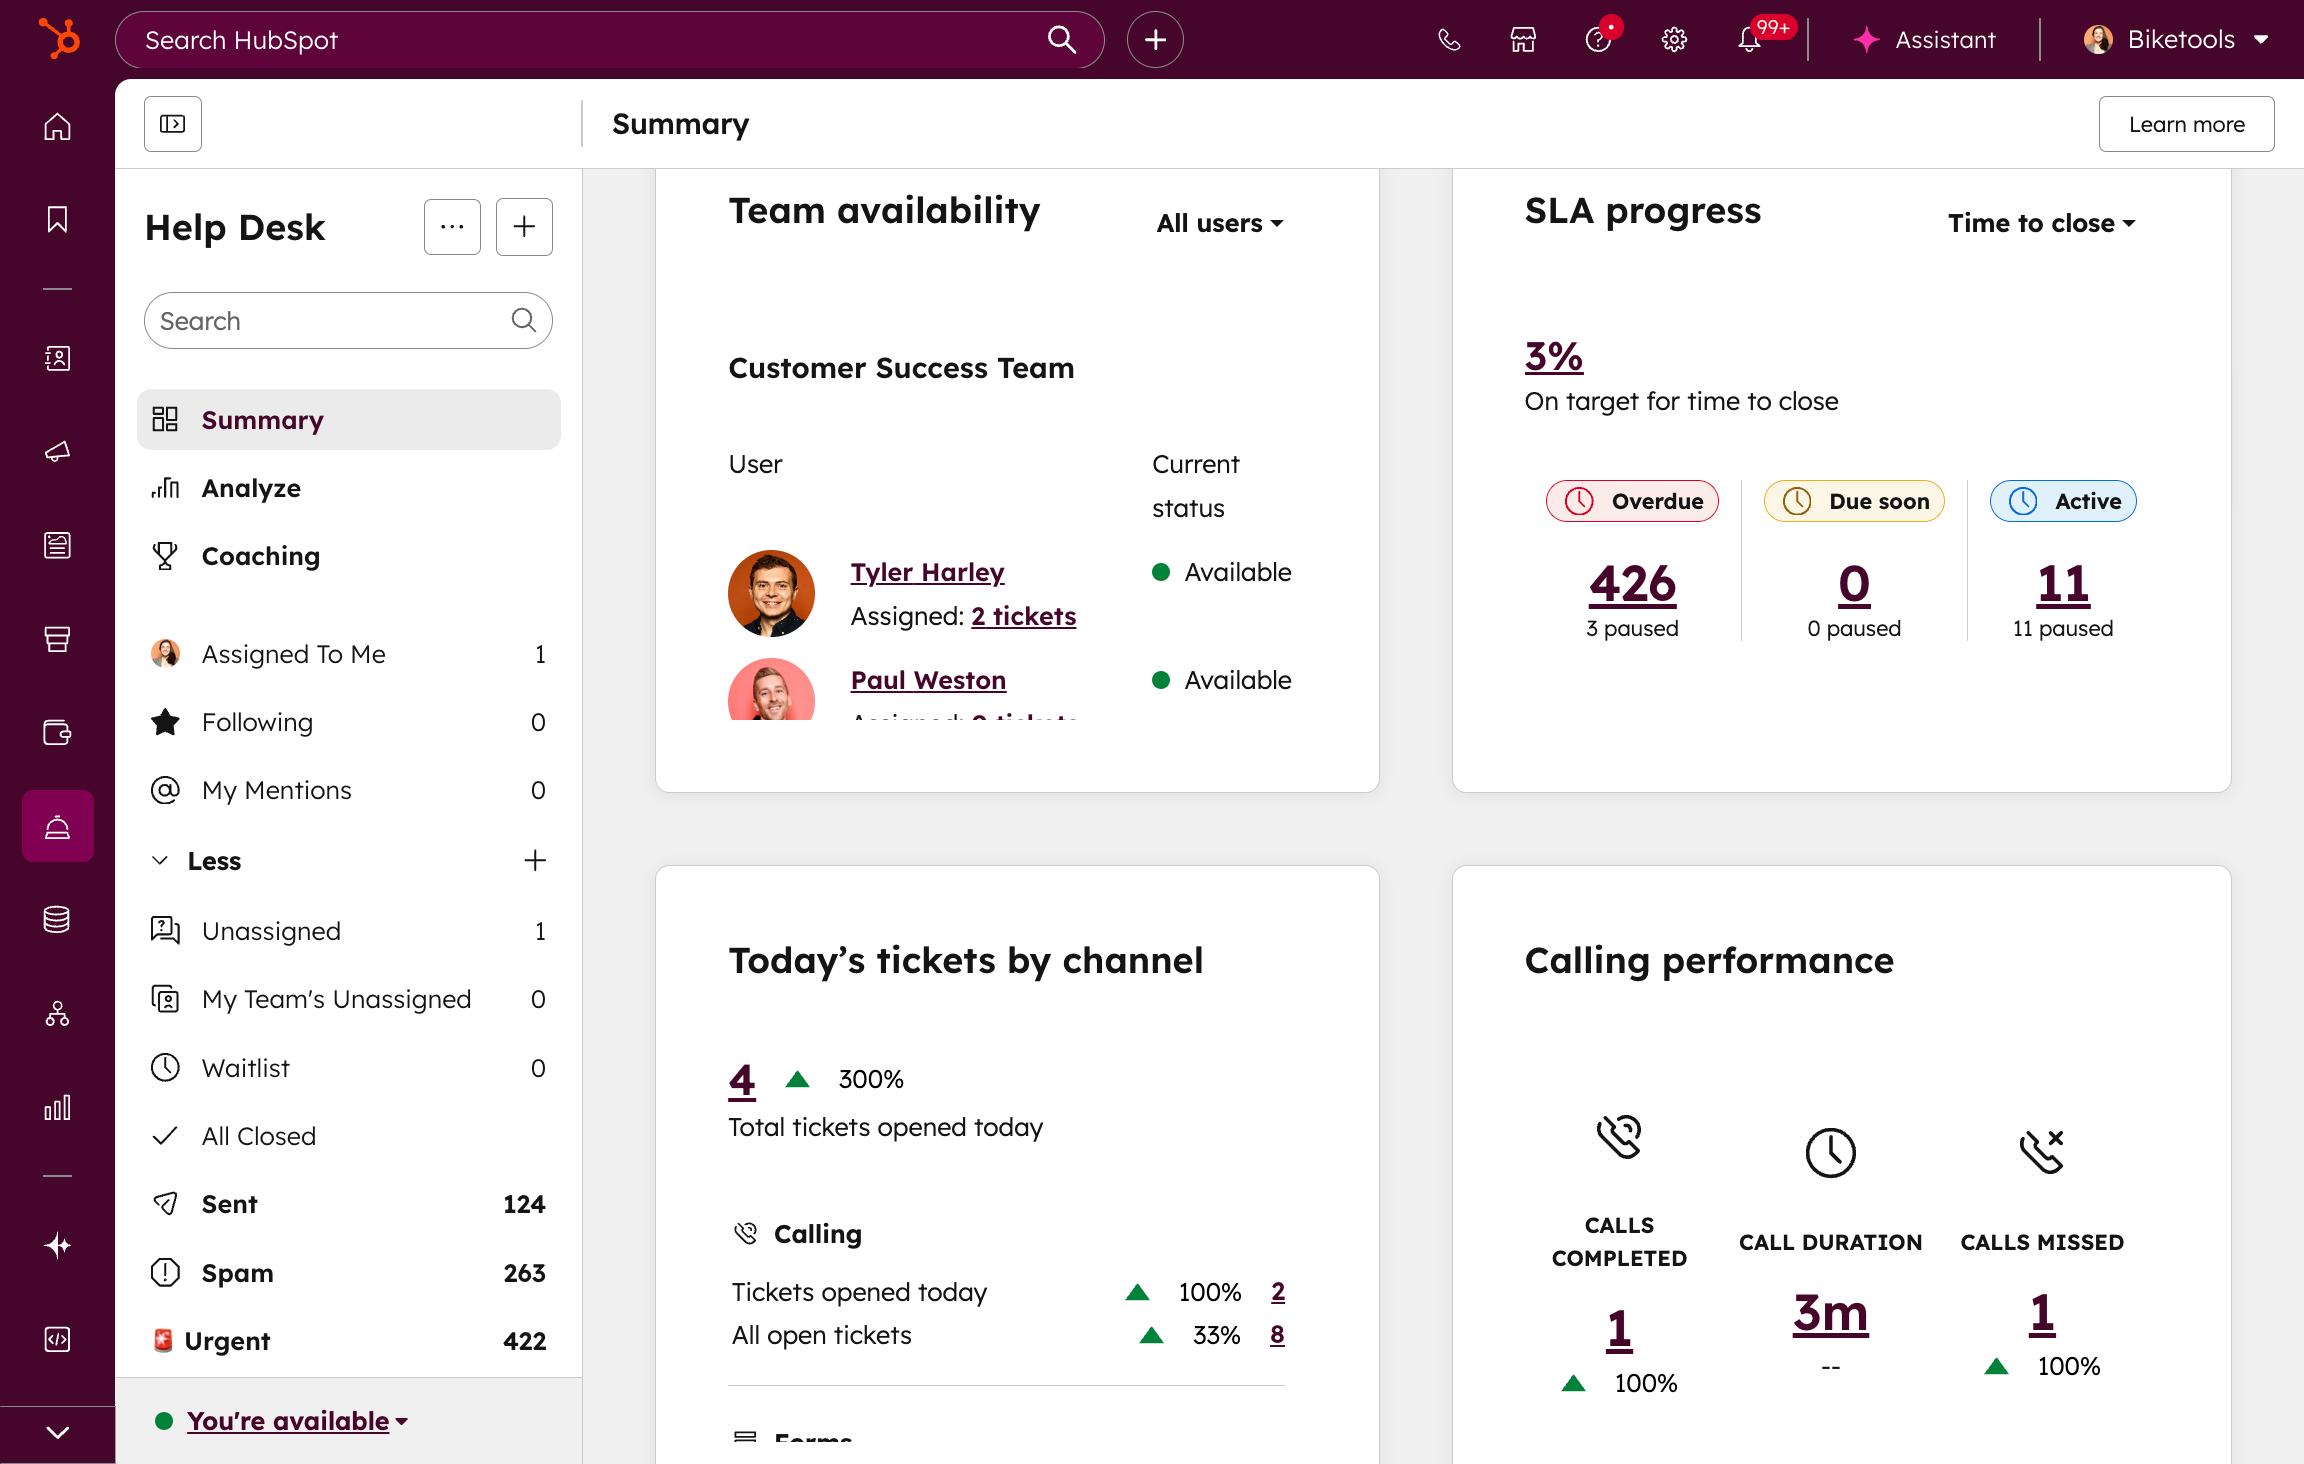
Example of the Help Desk
The Customer Portal is tied to your shared HubSpot inbox and knowledge base; it becomes an extension of your service process: customers can submit new requests, track progress, and access helpful articles in one place, while your team works from familiar HubSpot tools with full visibility into every interaction.
That means cleaner data, faster resolutions, and a much clearer picture of the full customer journey inside HubSpot — from first marketing interaction to ongoing support.
How to Set Up a Customer Portal in HubSpot?
Here’s how to set up a Customer Portal in HubSpot, step by step:
1. Check your subscription and tools
Ensure you’re on Service Hub Professional or Enterprise, and that you have already set up a shared inbox and knowledge base in HubSpot.
2. Navigate to Customer Portal settings
In HubSpot, go to Settings → Content → Customer Portal.

Finding Customer Portal in the HubSpot Settings
3. Create a new portal
Click to create a new portal and give it a clear, customer-friendly name (for example, “Support Portal” or “Customer Help Center”). Then select the domain you want to connect to the portal.
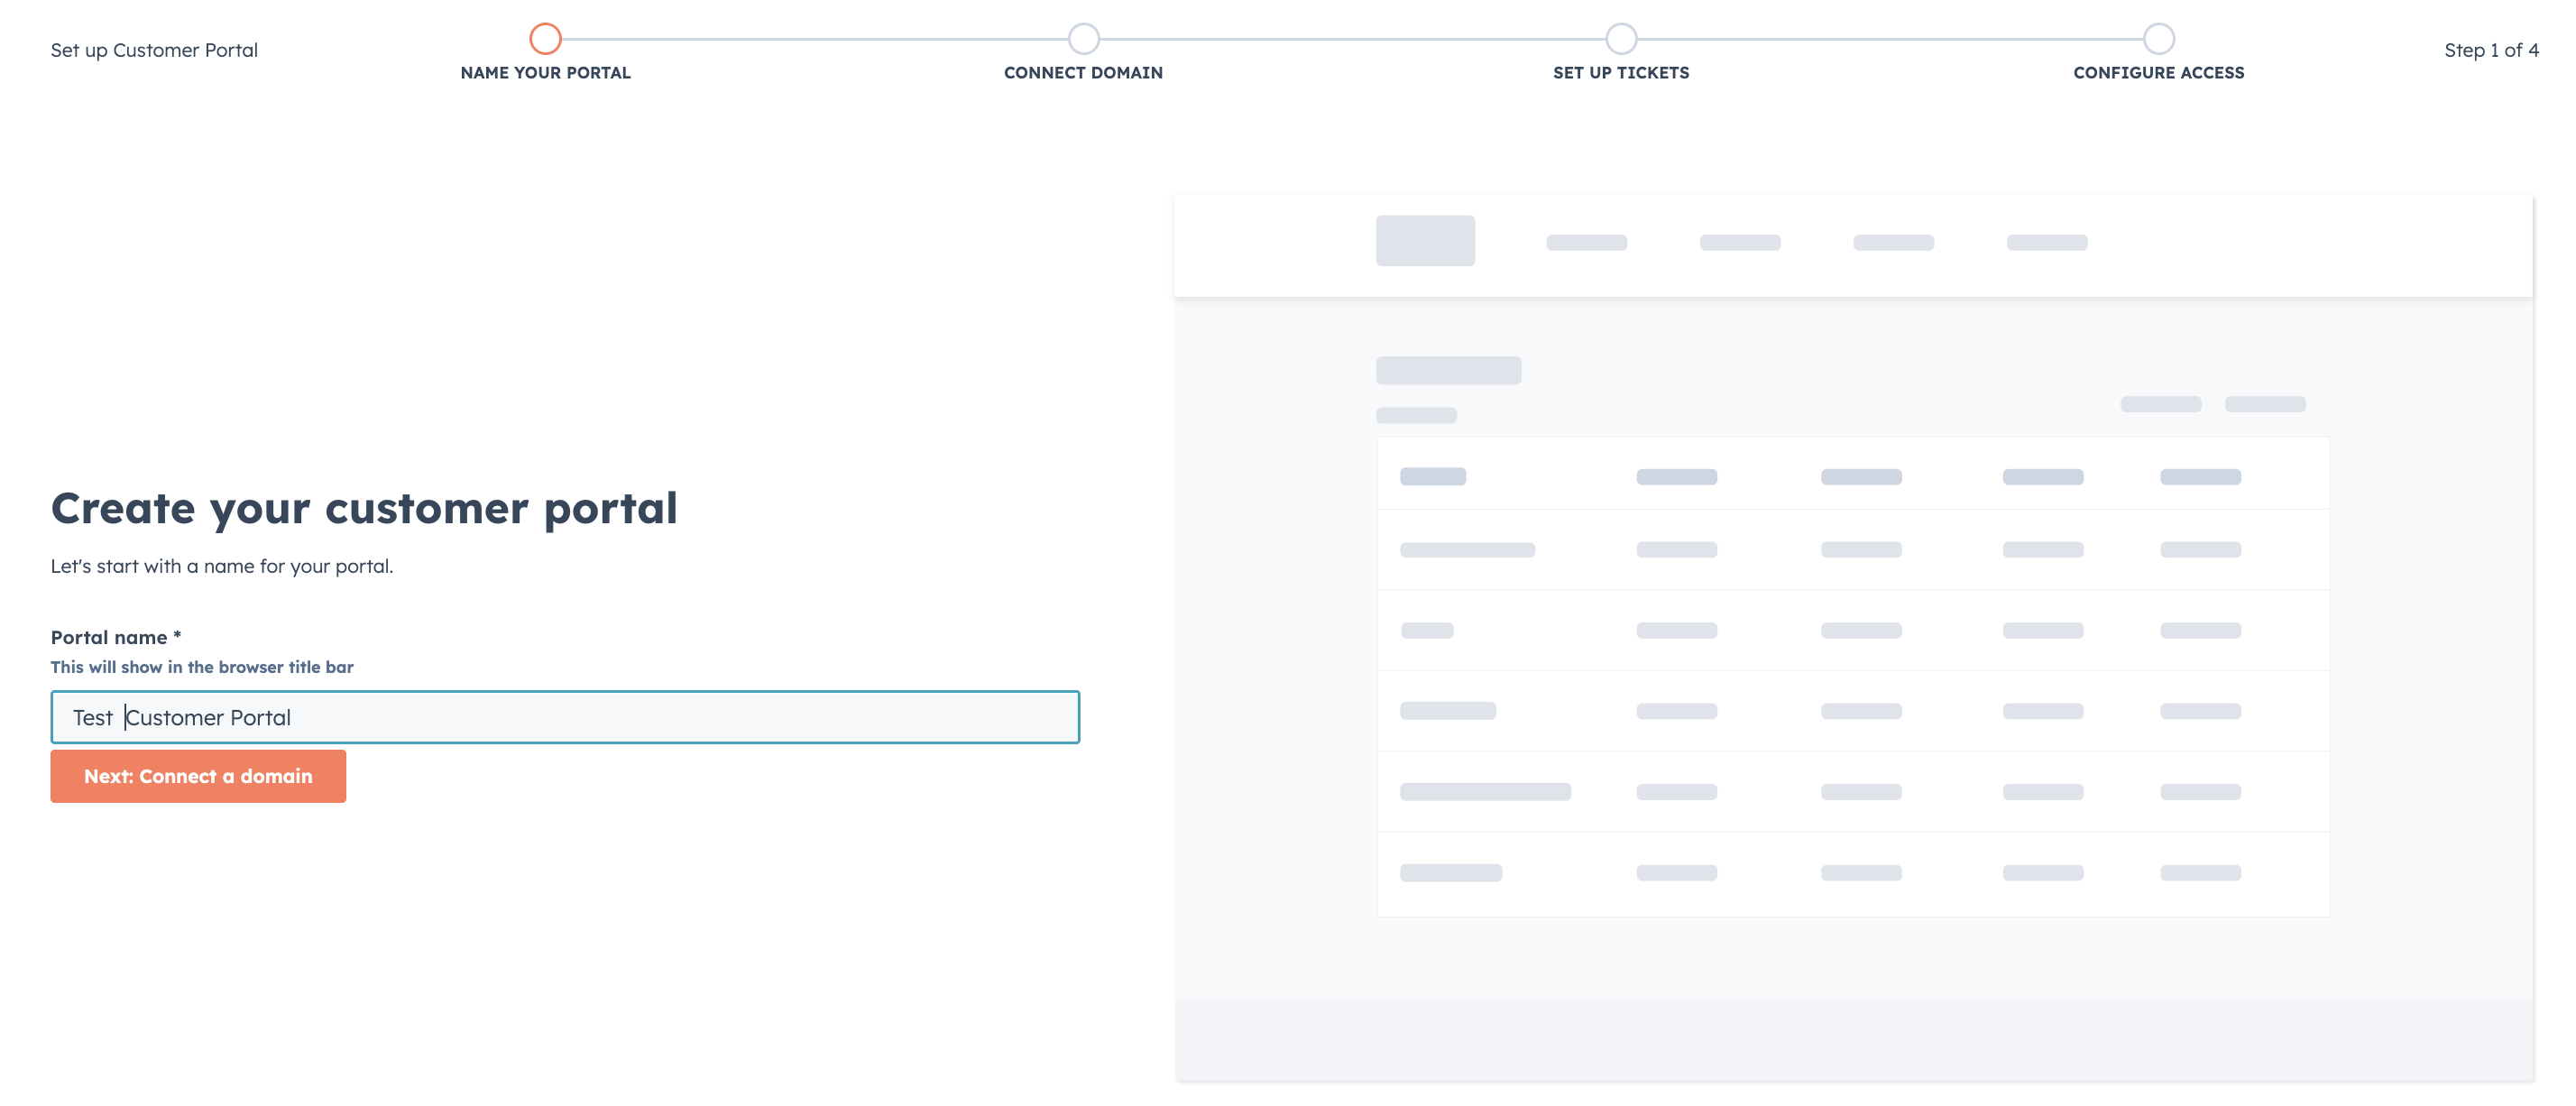
Step one of creating a Customer Portal in HubSpot
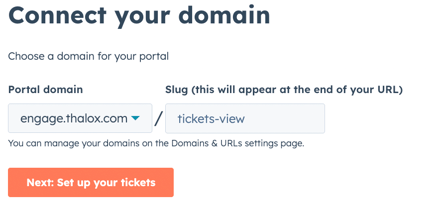
Connecting your domain to the Customer Support
4. Connect the right shared inbox
Select the shared inbox you want to link to the portal so that any tickets created there are automatically visible to your customers.
Setting up your Customer Portal to the right inbox.
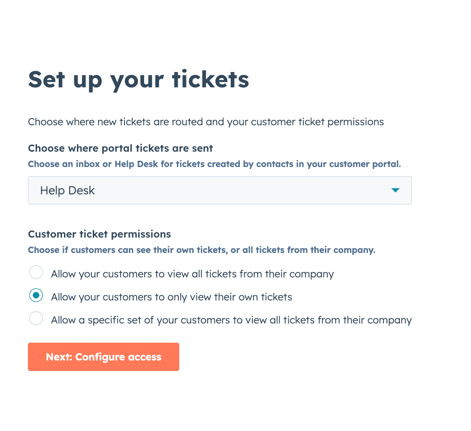
5. Configure what customers can see
Choose which ticket pipelines and statuses should be exposed in the portal (for example, only support tickets, not internal requests).
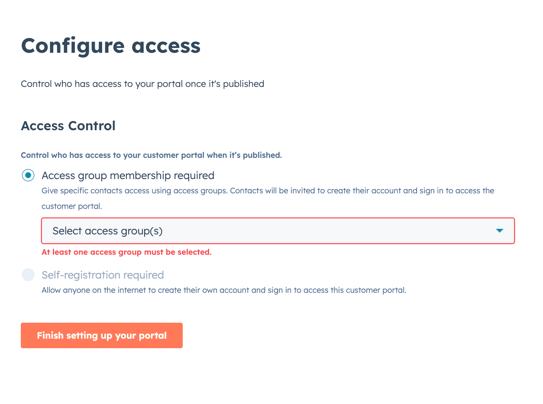
Access to your Customer Portal can be set up.
6. Customize branding and language
After the initial configuration, you'll be able to customize your portal appearance. Set the portal logo and brand colours, and choose the language your customers will see to keep the experience consistent with your website.

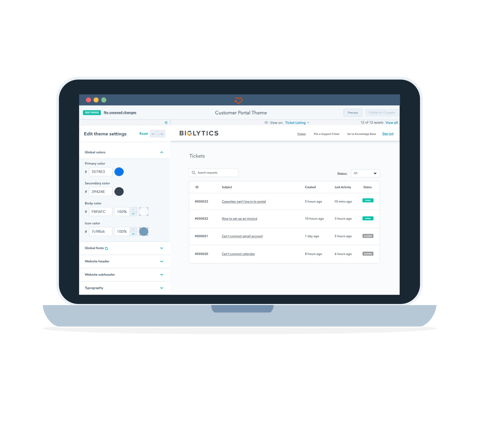
Edit the theme of your Customer Portal to match your brand.
7. Decide on ticket creation options
Configure whether customers can open new tickets directly from the portal and, if so, which ticket properties they must complete. Build a support form with the required fields in HubSpot Forms, then connect that form to your Customer Portal as the default support form.
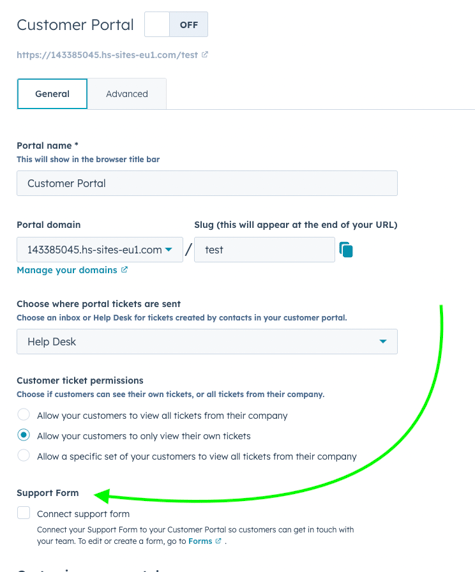
Customer Portal Settings
You can also fine-tune additional advanced settings directly in your Customer Portal.
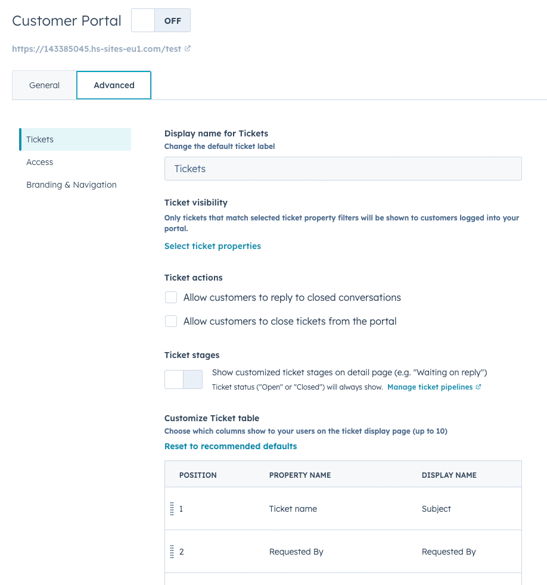
Customer Portal Advanced Settings.
8. Connect your knowledge base
Ensure your knowledge base is associated so customers can search and read help articles from the same interface.
9. Test the experience
Use a test or internal contact to log in, create a ticket, and check visibility, status updates, and article access end-to-end.
10. Roll it out to customers
Once you’re happy with the flow, share the portal link via email, your website, or in-app messages, and start directing customers there as their primary support entry point.
A well-designed Customer Portal in HubSpot gives your customers a secure, branded place to log in, track their requests, and help themselves — without chasing email threads or waiting on replies. It centralizes support, improves transparency, and keeps your service team focused, all while feeding clean, real-time data back into your CRM.
At Thalox, we help you go beyond “just turning it on” to designing a Customer Portal that truly fits your business, your SLAs, and your customer experience goals. From mapping the right pipelines and ticket properties to configuring permissions, branding, and reporting, we make sure your portal is not only live but fully aligned with your service processes and HubSpot data model.
If you’d like to explore what a custom-tailored Customer Portal could look like for your organization, book a call with our HubSpot Trainer Lisa — she’ll walk you through best practices, review your current setup, and outline a clear, actionable plan to get from today’s support reality to a scalable, efficient, and customer-friendly portal in HubSpot.